Users
vimigo's people directory - where you invite, activate, manage, and offboard every employee in your company.
What is it?
Users is the platform layer that holds one record for every person in your company. Before you can set a goal, track attendance, or award a diamond, the person needs to exist here.
Each user record carries three things:
- Profile - name, email, phone, birthday, photo, bio, and personal details.
- Employment - position, department, role, staff ID, hired date, EPF / SOCSO / income tax numbers.
- Status - whether the person is active, disabled, resigned, or still in the invite stage.
Salary is not stored in vimigo. Use a payroll system (like PayrollSiti) for pay data.
Login credentials, password resets, and two-factor authentication are handled by a separate auth service - when you click "Reset Password" in the admin panel, that service sends the email.
Quick Start
To get your first employees into vimigo:
- Go to Admin Panel > "People".
- Click "Add People".
- Fill in "Display Name", "Email", and pick a "Role". Set a temporary "Password".
- Click "Submit" - the employee is active and can log in.
- Repeat for a few people, or use "Upload using Excel" to add 5+ at once.
After this, each person can log in, check their profile, and start using whatever modules you've enabled.
For Admins (Employer / HR / Manager)
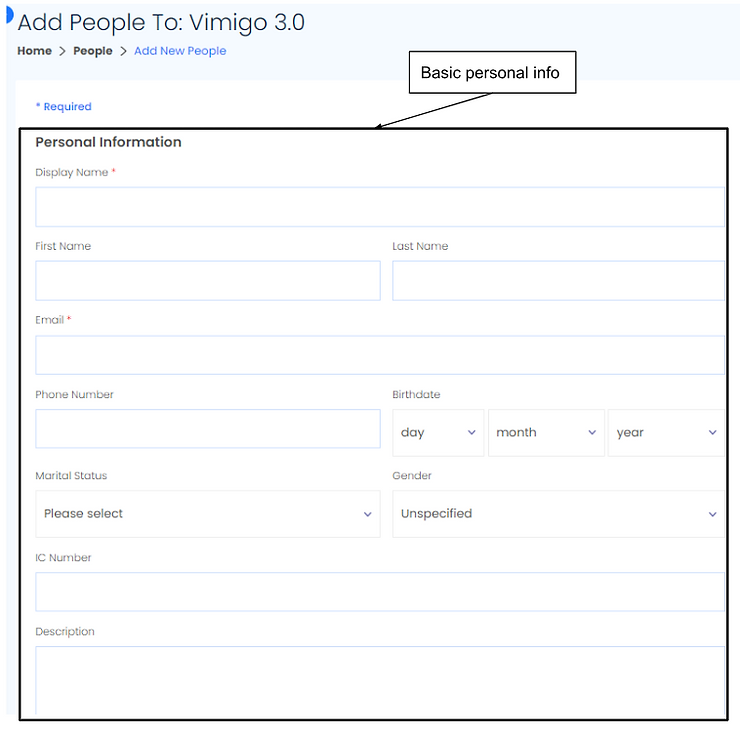
How to add a single employee
- Admin Panel > "People" > "Add People".
- Fill the required fields:
- "Display Name" - how the person's name appears everywhere (e.g. "Aisha Rahayu").
- "Email" - login email. Must be unique across all vimigo accounts.
- "Role" - pick from "Employer", "Human Resource", "Manager", or "Staff" (or a custom role your company created).
- "Password" - at least 8 characters, with uppercase, lowercase, and a number.
- Optional but useful:
- "Department" - assign on creation, or do it later in bulk.
- "Position" - job title, e.g. "Senior Sales Executive".
- "Hired Date" - affects year-of-service calculations.
- "Staff ID" - unique per company; used in payroll matching.
- Click "Submit".
Tip: If you leave "Password" blank and use the invite flow, the system sends a welcome email. The employee clicks the link, sets their password, and lands in "On-boarding" status. Click "Set Active" when they've logged in the first time.
How to bulk-import many employees via Excel
Best for onboarding 5+ people at once.
- Admin Panel > "People" > click "Upload using Excel".
- Click "Click here for people excel template" and save the file.
- Open the template in Excel. Row 1 has the headers - don't change them. Start data from row 2.
- Fill the required columns:
- Display Name (required)
- Email (required, unique)
- Access Right (required - must match a role name exactly, e.g. "Manager")
- Fill optional columns as needed: First Name, Last Name, Phone Number, Birthdate (YYYY-MM-DD), Marital Status, Gender, IC Number, Department, Position, Income Tax Number, Socso Account Number, EPF Number, Date Hired, Website, Staff ID, Leave Group.
- Save as
.xlsx. - Click "Choose File" > select the file > "Submit".
- New people appear in the People list. Rows matching existing emails are treated as updates.
Tip: Empty rows are silently skipped. Check for invisible spaces if a row seems fine but doesn't import.
How to bulk-assign department and role
After bulk-importing, assign everyone to their department and role at once.
- Admin Panel > "People" > "Assign" tab.
- Tick the checkboxes next to the employees you want to assign.
- Pick a "Select Department (Optional)" and/or "Select Access Right (Optional)".
- Click "Assign".
The page highlights rows by status:
- Blue names - no department AND no role yet.
- Orange names - partial (one of them is missing).
- Normal names - fully assigned.
How to update an employee's details
- Admin Panel > "People" > search for the person.
- Click their name, then click the edit icon.
- Update whatever has changed - new "Position", new "Department", updated "Phone Number".
- Click "Submit".
For bulk metadata updates: export the staff list to Excel, edit it, then re-upload via "Upload using Excel". Rows with existing emails update those users.
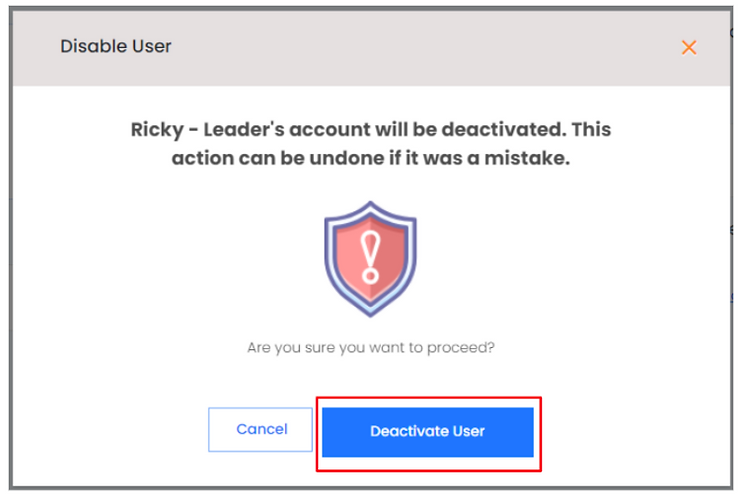
How to temporarily suspend an employee (Disabled)
Use this for long unpaid leaves, suspensions, or situations where the person shouldn't be able to log in but might come back.
- Admin Panel > "People" > find the person > edit.
- Scroll to the "Status" section - it shows "User status is Active".
- Click "Set Disabled".
- The person can no longer log in. Their data stays intact.
- To reactivate later, repeat and click "Set Active".
How to mark an employee as resigned
When someone leaves the company for good.
- Admin Panel > "People" > find the person > edit.
- Scroll to the "Resignation" section.
- Enter "Resignation Date" - the person's last day.
- Optionally add a "Resign Remark", e.g. "Resigned for further studies".
- Click "Mark Resigned".
- The person's status becomes "Resigned". They can't log in. Their historical data (goals, sales, reviews) stays visible for reports.
Warning: Resignation is permanent through the UI. There's no "Un-resign" button. If you mark someone resigned by mistake, contact vimigo support for a manual correction.
How to re-send an invite when the employee lost the link
- Admin Panel > "People" > find the person (usually in "Pending" status).
- Click the name > edit > scroll to the Reset Password section.
- Click the option to send a new password-reset link - the auth service emails a fresh link.
- Or set a new temporary password directly and share it with the person securely.
How to export your staff list
Good for audits, payroll prep, or offline review.
- Admin Panel > "People" > Export button.
- Open the downloaded Excel file. It contains all profile and employment fields (same columns as the import template).
Salary is not included - vimigo does not store pay.
Employee status - what each one means
| Status | Can log in? | When to use |
|---|---|---|
| Active | Yes | Normal working employee. |
| Pending | No | Account created via invite but they haven't clicked the link yet. |
| On-boarding | Yes (limited) | They registered via the invite link but you haven't fully activated them yet. |
| Disabled | No | Temporarily suspended. Data preserved. |
| Resigned | No | Employee has left the company. Historical records preserved. |
Transitions: Active ↔ Disabled (via "Set Disabled" / "Set Active"). Any status → Resigned (via "Mark Resigned", one-way).
For Employees
How to update your own profile
- Log in to vimigo.
- Click your avatar or name at the top right > "Profile" > "Edit".
- On the "Profile" tab, update:
- "Display Name" (if your management user allows it)
- "First Name", "Last Name", "Phone Number", "Birthday", "Gender", "Website"
- "Description" - short bio shown on your public profile
- Click "Submit".
How to change your profile picture
- "Profile" > "Pictures" tab.
- Click "Upload Photo".
- Pick a JPEG or PNG from your device. Square images look best.
How to update statutory numbers (EPF, SOCSO, Income Tax)
- "Profile" > "Profile" tab.
- Scroll to "Income Tax Number", "Socso Account Number", and "EPF Account Number".
- Enter the values and click "Submit".
How to add social media links
On the "Profile" tab, look for the social media section and add links for Facebook, Instagram, LinkedIn, TikTok, YouTube, or Twitter. These appear on your public profile visible to colleagues.
How to change your password
- "Profile" > "Password" tab.
- Enter your current password, then the new password twice.
- Click "Submit".
If two-factor authentication is enabled for your company, the "Security" tab walks you through linking an authenticator app.
Settings & Configuration
| Setting | What it does | Default | Where |
|---|---|---|---|
| "Allow staff and Manager to update Display Name" | Lets employees change their own display name | Off | Company Settings > General |
| "Consider Onboarded?" | Marks the person as having finished onboarding (affects welcome screens) | Off | User Edit page |
| "Assign as Company PIC" | Marks this user as the Principal-in-Charge | Off | User Edit page |
| "Resign Remark" | Free-text note on why someone left | Empty | User Edit > Resignation |
| User Limit | Max active employees your plan allows | Varies by plan | Set by vimigo support |
Excel template columns (import / update)
Required: Display Name, Email, Access Right.
Optional: First Name, Last Name, Phone Number, Birthdate (YYYY-MM-DD), Marital Status, Gender, IC Number, Description, Department, Position, Income Tax Number, Socso Account Number, EPF Number, Date Hired, Website, Staff ID, Leave Group.
FAQ
Q: I imported an Excel file but some employees didn't appear.
A: Empty rows are silently skipped. Check for rows that look filled but contain only spaces. Re-download the template and paste your data fresh.
Q: A user's name shows as their email instead of their real name.
A: The "Display Name" was left blank when the account was created. Edit the user and set "Display Name".
Q: The "Set Active" button is missing for a resigned user.
A: Resignation is permanent through the UI. Contact vimigo support to reverse it if needed.
Q: My Excel upload completed but one person got the wrong role.
A: The Access Right column must match an existing role name exactly - including capitalization and spaces. Export the current staff list to see the exact names your company uses.
Q: I hit a user-limit error when adding a new employee.
A: Your plan has a cap on active employees. Disable or resign former staff to free up slots, or email vimigo support to upgrade your limit.
Q: Where do I reset an employee's password?
A: "People" > click the person > edit > Reset Password section. You can either send a reset email or set a new password directly.
Q: Can the same person belong to two companies in vimigo?
A: Yes. One email can be a member of multiple companies. The mobile app lets the person switch company context. The admin panel only shows the company you're currently logged into.
Q: Is salary stored anywhere in vimigo?
A: No. Salary columns were removed in mid-2025. For pay data, integrate a payroll system.
Q: What happens to a resigned person's historical goals and sales?
A: Everything stays visible for reports - the person just can't log in. Their department label on historical records also stays intact, which is intentional for accurate reporting.
Related Guides
- Company - global settings that affect every user (display name policy, user limit)
- Departments - assign each user to a department for goal scoping and leaderboards
- Roles & Permissions - what each role (Employer, Manager, HR, Staff) can see and do